
November 2018 Blog : Christmas Plates with Snow Effect and Sparkle
- Nargis Khan

- Nov 18, 2018
- 2 min read
Updated: Nov 18, 2018
Christmas is around the corner ,so here is a super easy tutorial on how to decoupage a Christmas themed Plate with Snow and Glitter Effect.

Listing all the Supplies used, Plain white Ceramic Plate, Decoupage Napkin, Modpodge Matte, Modelling Paste, Fairy Dust, Varnish, Sponge, SandPaper and Brush.

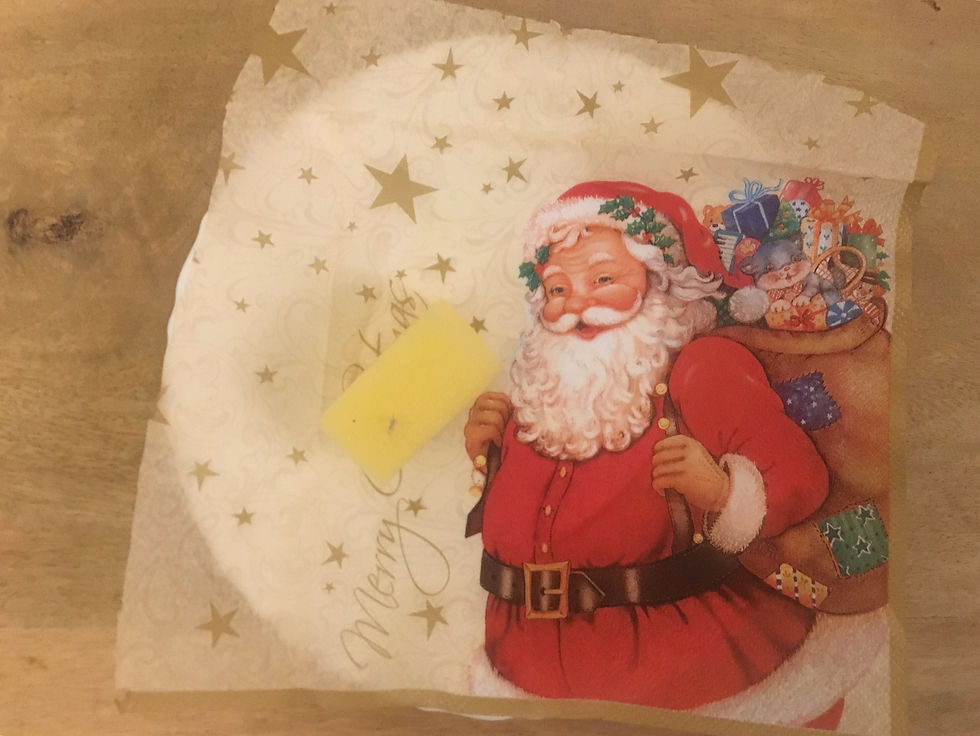
Steps 1 : Select a Christmas themed Decoupage Napkin and cut it a little bigger than the size of the plate

Step 2: Decouapage Napkin useed here has three layers, remove each layer one by one. Will be using the top layer.

Step 3: As the plate has a white base, Decoupage Napkin can be directly glued on the plate.
Use Modpodge Matte to glue the napkin on the plate surface. As the plate has a curved surface, I have glued the napkin with help of a clean and dry sponge.
Step 4: Work on smaller areas, apply Modpodge with brush , glue the napkin slowly with help of dry sponge.

Step 5: Remove the extra napkin on the edges with help of Sand paper.
Step 6: Seal the Napkin with a coat of Modpodge on the top,

Step 7: To give a snow effect on the edges, apply Modelling paste with help of your index finger. Dab with your finger to give a snow like look.

Step 8: Sprinkle the fairy dust on the snow and the plate while the Modelling Paste is still wet so that fairy dust gets sticked to the surface.

Step 9: Dry the modelling paste for atleast an hour and then Varnish it with Aquador to give a finished look,

Hope you have enjoyed the blog. Wish you a Merry Christmas!!
You can get the carft supplies used at below links:
Plates for Decoupage :
https://www.mrmuffin.in/canvas-bags-candles-plates
Decoupage Napkin:
https://www.mrmuffin.in/decoupage-napkin
Modpodge & Modelling Paste:
https://www.mrmuffin.in/mod-podge
Happy Crafting !!


What a route towards begin the 2021 NFL monthly time with a enjoyable 31-29 victory by way of Tom Brady and the shielding Tremendous Winner Tampa Bay Buccaneers above Dak Prescott and the Dallas Cowboys. With the Thursday evening video game wrapped up, all eyes are fastened upon Sunday after 28 groups will devices up for their respective 7 days 1 matchups. Simply as the Cowboys-Buccaneers sport finished up getting a shootout, the Cardinals-Titans sport need to be no alternative.Right here are 5 Arizona Cardinals components towards check out Sunday once they generate toward Nissan Stadium inside of Nashville in direction of consider upon the Tennessee Titans:1.A quarterback shootout involving Kyler Murray and Ryan TannehillMurray performed in j…